FUN, MODELS & PEDANTRY
The Funderstanding Series
Visualizing the 4th Dimension with WebGPU
Shaders as far as the eye can see
Dec 2025 | By Daniel Dugas Follow
Can our brains intuitively understand 4D?
It’s something that I’ve always wondered. And since nothing is better than giving our curiosity some practice, I decided to give it a try.
Why a 4D Camera?
Often when trying to visualize a 4D object, we are asked to do so from a 2D image or video. This makes sense, because our screens are inherently 2D. But when you think about how our brains are exposed to 3D, it’s often through our eyes, which are essentially cameras: they project the 3D world to a 2D sensor, from which we then reconstitute our 3D understanding.
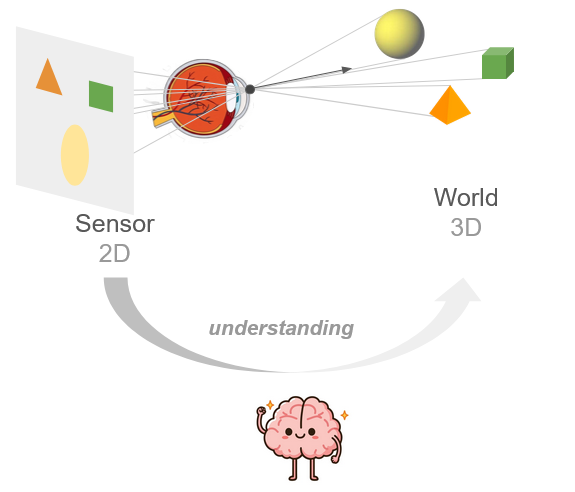
Fig. 1 The brain bootstraps 3D understanding from sequential 2D data.
With some practice, could it do the same from 3D to 4D?
If we extrapolate, there’s a chance that to better “get” 4D, we need to perceive its projection into a 3D sensor (which lucky for us, our brains can inherently understand.), as the jump from 2D to 4D is a big one (imagine trying to understand the 3D world when given only a 1D line of pixels…). Think of it as getting a glimpse into the mind of a 4D being, by emulating their eye.
That’s why I made Hypercamera, a demo using three.js to render the 3D camera sensor projection of a 4D world.

Custom Rendering Pipeline with WebGPU
The Hypercamera demo was fun to play with, but pretty soon the limits of this type of rendering on CPU became apparent. And it became clear we would need a more powerful rendering system.
First a quick explanation of how the Hypercamera rendering works:
Simply put, there are two stages:
- 4D to 3D Projection of vertices and lines to camera space (custom, CPU)
- 3D Primitive Rasterization to 2D using standard threejs
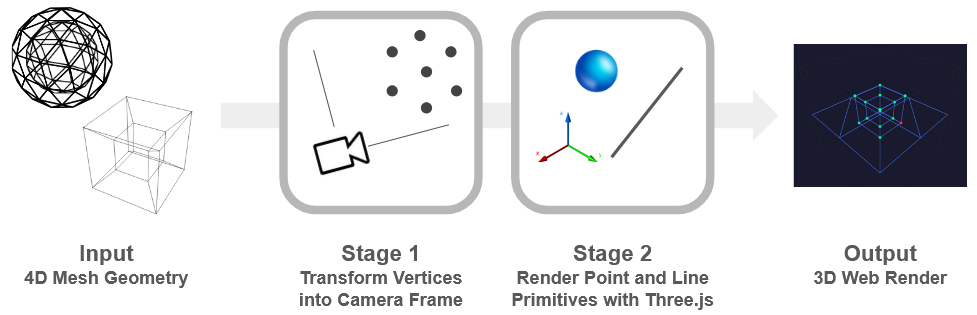
Fig. 2 The simplified-rendering pipeline used in the Hypercamera demo above.
This is a minimal way of emulating the sensor of a 4D camera, and made it very simple to quickly get visuals, as the first part is just some matrix transforms, and the second is populating the spheres and lines in a 3D scene. On the other hand, it means we only have vertices and wireframes, no fills, colors. And of course, we’re severely limited in terms of the amount of vertices and objects we can have in our scene.
A proper native pipeline should instead look like this:
First the traditional rasterization pipeline stages (but in 4D, so triangles -> tetrahedra, 2D pixels -> 3D voxels):
Stage 1 - Per Vertex: Convert vertex from world to camera coordinates
Stage 2 - Per Tetra: Cull clipped tetras and assign valid tetras to bins in the acceleration structure (screen-space tiles)
Stage 3 - Per Voxel: Query the acceleration structure, then do intersection tests to figure out if voxel is inside a tetra, store nearest result in z-buffer
And an additional stage which renders the 3D sensor to the screen:
Stage 4 - Per Pixel: DDA ray traversal of the 3D sensor grid
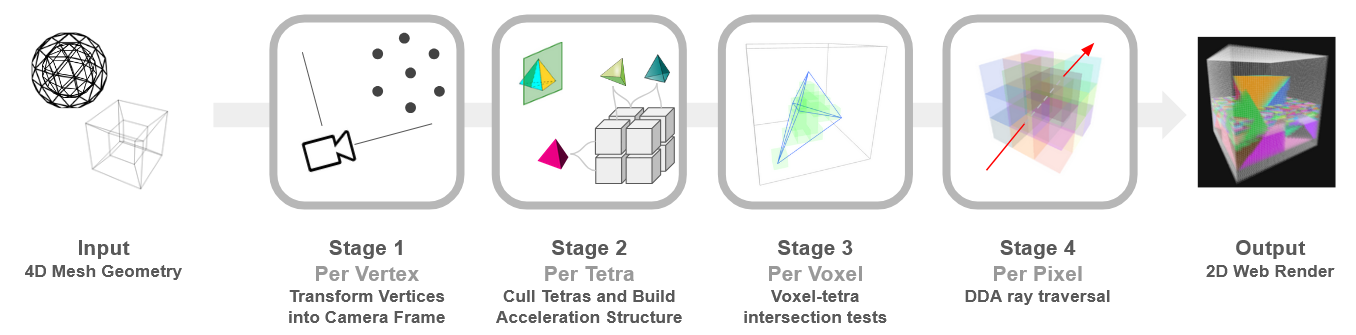
Fig. 3 The full Hypercamera rendering pipeline, all stages are executed on the GPU
The first three stages need to be done in compute shaders, because the standard fragment shader pipelines are limited to operating on a 2d canvas. Luckily, WebGPU supports all this: we can do the first 3 stages in separate compute shaders, and then do the 4th in a fragment shader to get the final render.
It was quite a lot of work to figure out the WebGPU API, buffers, pipelines and so on. But it was definitely worth it, we can now render almost a million tetras inside a 64x64x64 voxel sensor at two-digit fps on my laptop.
Try it yourself! (Requires a GPU)
Note: There is also a CPU version of the custom pipeline if your computer does not support WebGPU, although the scene is frozen to keep performance acceptable.
What’s Next
This is only the second step in the Hypercamera journey!
With the renderer (and basic physics) in place, we have the first components of a web-based 4D game engine.
The next steps are to create the 4D worlds to be visualized, with textures instead of random colors and meaningful shapes.
I already have some in mind, for example 4D fauna, flora, and maybe some cool geography. Coming soon!
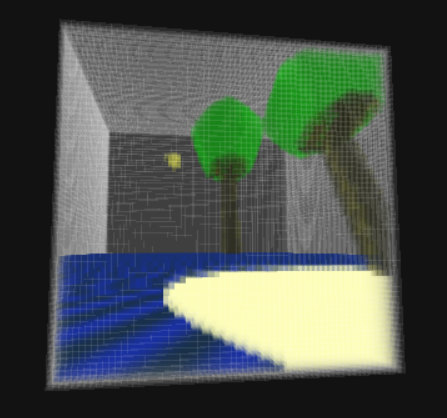

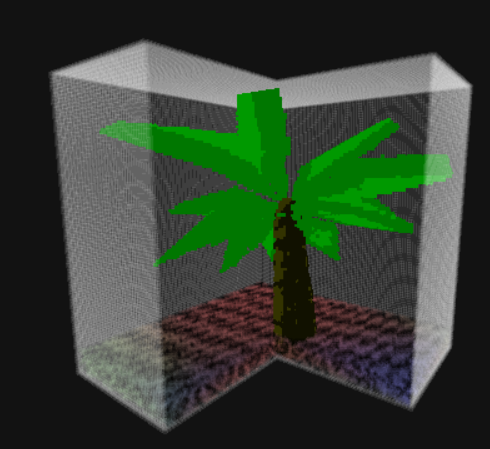
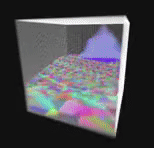
Fig. 4 Teaser of worlds and creatures that can be created and explored with the new web-based Hyperengine
(if you really can't wait, here's the alpha version of the next demo, where you play an astronaut stranded on a small island, after crash-landing on a 4D planet)
Pseudocode
The full source code is available for the simplified pipeline, the custom pipeline (CPU version), and the custom pipeline in WebGPU. I made each of them a single html file with all the javascript included.
Still, the pseudocode for the custom pipeline can help understand it a little better.
Stage 1:
Stage 2:
* I am grossly simplifying this line. In practice it requires several compute shader steps on GPU, because each tile needs a differing amount of storage, which is only known part-way.
So the acceleration structure creation is done in the following substeps:
Stage 2.1. Same as above, but only increment counter for # of tetras in each tile
Stage 2.2 Parallel Prefix-sum scan to caculate the tile index/offset in memory by summing the counters
Stage 2.3 Actually assign the tetra indices to the memory using the calculated offsets.
See the source code for the actual implementation on WebGPU.
I couldn't find a great resource on this topic, although this was the closest. (and of course, you can just look at the source code for demo).
Stage 3:
Stage 4: